Docs Menu
- Introduction to Syncloop
- Quick Start Syncloop
-
API Developer Guide
-
middleware
-
pub
- adapter
- authorization
- client
- collection
- date
- docList
- file
- graphQL
- io
- json
- jwt
- math
- platform
- security
- server
- service
- specs
- sql
- string
- bytesToHexString
- bytesToString
- compare
- compareStrings
- concat
- decodeBase64
- decodeHTML
- encodeBase64
- encodeHTML
- equals
- equalsIgnoreCase
- escapeSQL
- fromXML
- htmlDecode
- htmlEncode
- indexOf
- isAlphanumeric
- isBlank
- isDate
- isEmpty
- isNumber
- length
- lookupDict
- maskString
- messageDigest
- messageFormat
- NullOrWhiteSpc
- objectToString
- padLeft
- replace
- rightPad
- stringConcat
- stringIndexOf
- stringToBytes
- subString
- TextArrayToTextString
- TextListCollector
- tokenize
- toLower
- toString
- toUpper
- trim
- urlDecode
- tenant
- util
- xml
-
pub
-
middleware
- User Guide
- FAQs
- Java Docs
- Blogs
Exception Handling
The exception is defined as an unanticipated condition that can occur while the execution of code. It interrupts the execution of code which can lead to abnormal termination of the program, affecting data, results, or even the environment. Exception handling is a very important feature of any programming language. It enables a programming language to handle these unanticipated conditions leading to a proper termination of the program saving data, results, and the environment.
in this tutorial, we will demonstrate how you can handle exceptions in your API service. In this tutorial, we will also understand how to send custom objects and customer information with your exceptions. So let us get started.
Login into the Syncloop API Development Platform
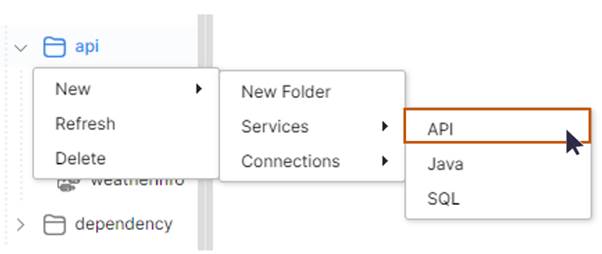
Create a API Service and name it as HandlingExceptions.
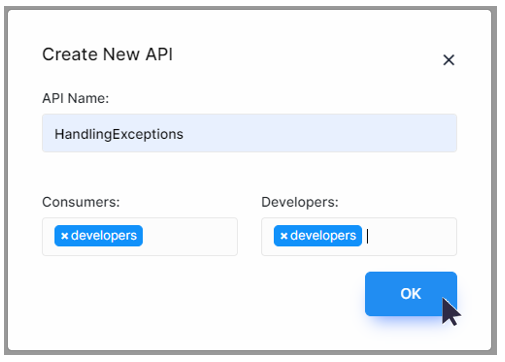
Assign a group and click on the OK button. The Service will be created and automatically saved.
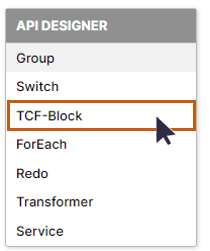
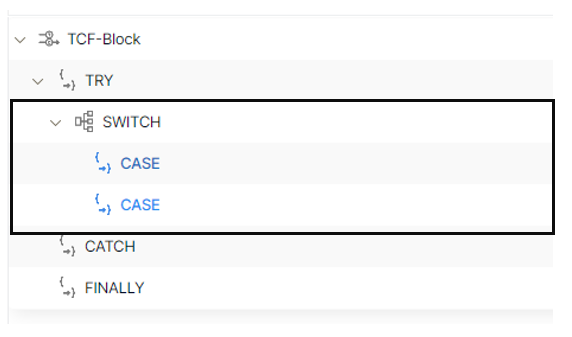
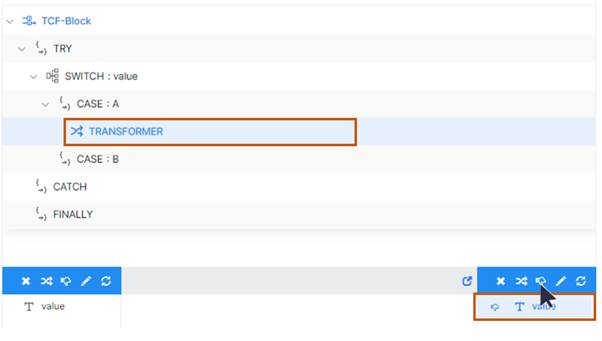
Right-click on the workspace and create one TCF Block
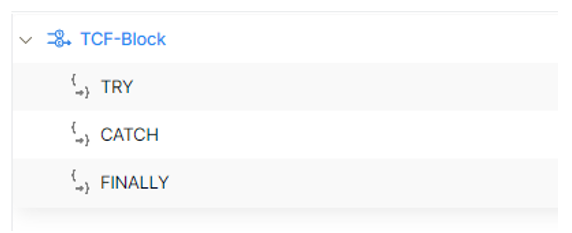
A TCF block (Try, Catch, and Finally) will be created in the workspace
Let us add one switch statement under the TRY-Block with two cases. How to use Switch-Case has already been discussed in the conditional logic tutorial.
Create an input variable of type STRING and name it as value
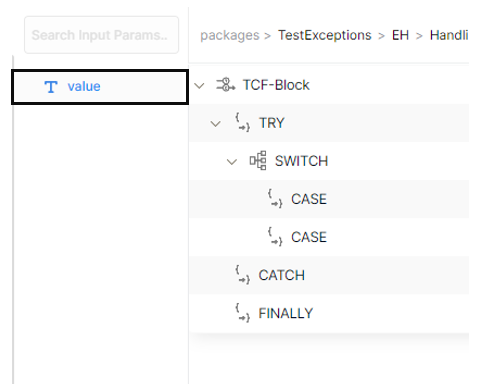
To evaluate the value for the Switch Statement, right-click on the switch statement and select properties.
Under the Switch textbox, enter the name of the input variable value and click on the OK button.
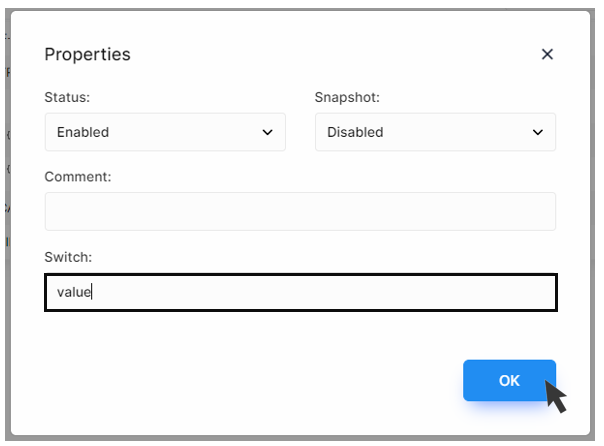
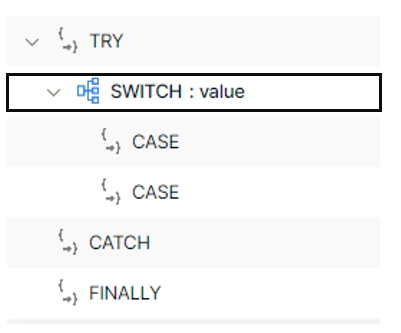
The value will be displayed with the switch statement. The value is the evaluation parameter of the Switch Statement.
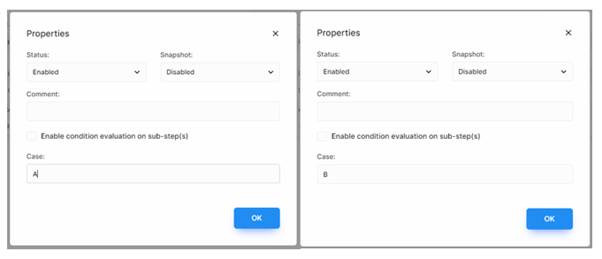
Now populating the cases, right-click on the CASE Step and select properties. Assign the value of CASE as A for the first CASE and B for the second CASE.
The TCF block will be displayed

Let us create two separate exceptions for these cases A and B.
Create one Transformer under case A and drop the variable value as it is not needed further by selecting the variable value and clicking on “drop the element”.
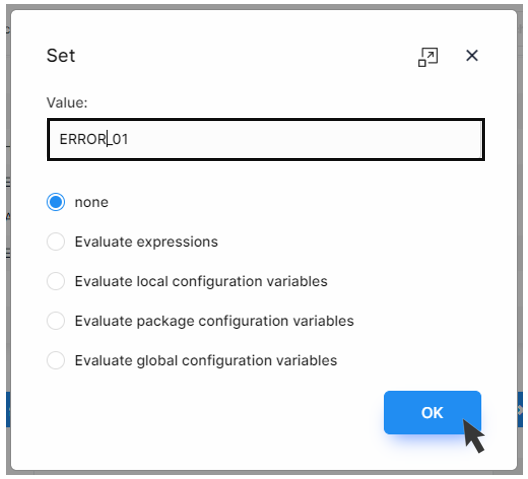
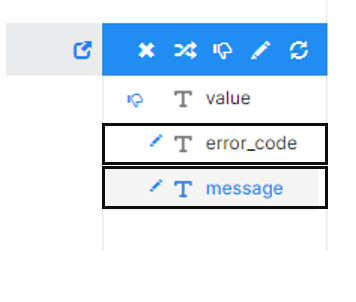
Create a STRING variable error_code in the Response Section
Assign the STRING vale ERROR_01 to the error_code variable by right-clicking on the error_code variable and selecting properties.
A new STRING variable error_code will be added and initialized.
Select the none option in the Set dialog and click on the OK Button.
Create another STRING variable message in the Response Section and assign a value “This is Case A” by selecting the message variable and clicking on the “initialize element” tool.
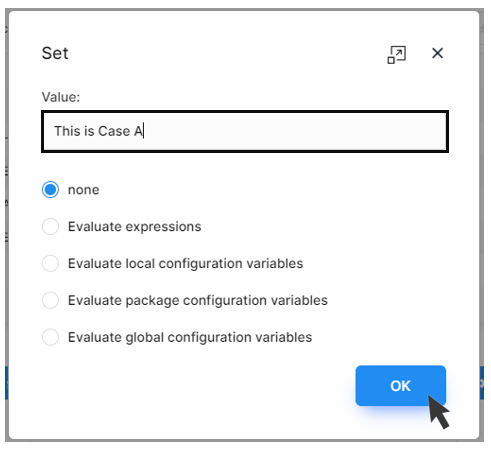
Two STRING variables error_code and message will be created and initialized in the Response Section.
Save the Service.
Now let us call the throwException class. Here we are forcefully throwing the exception. (The adding of classes is already discussed in the previous tutorial videos). Here we are forcefully throwing the exception.
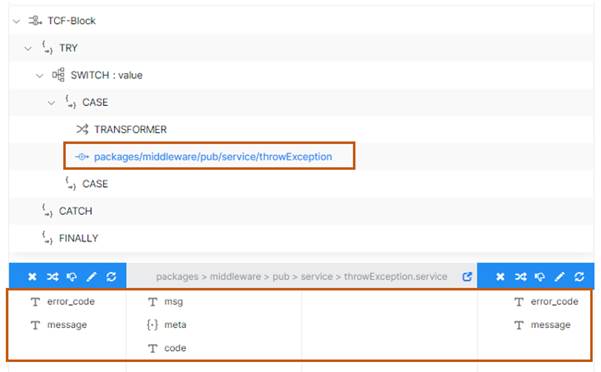
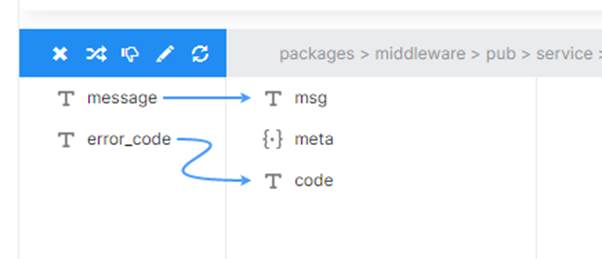
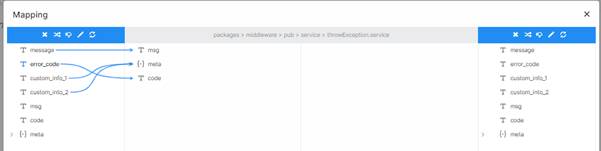
Now click on the throwException Class and map the variables message with msg and error_code with code.
Create a customer object as customer_info_1 the Response Section, assign the value as customer_info_1_case_a, and click the OK Button.
Create another customer object as customer_info_2 in the Response Section, assign the value as customer_info_2_case_b and click the OK Button.
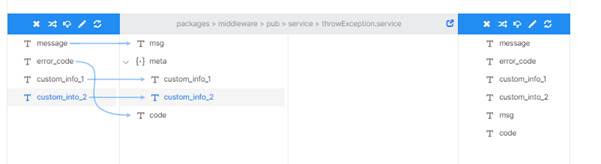
Now select the Transformer step and create these two values under the meta–Document Type variable and a Transformer with customer_info_1 and customer_info_2 in the Response Section.
Now select the throwException service and create customer_info_1 and customer_info_2 under meta Variable object.
Map the Customer_info_1 in the Request Section to the Meta > Customer_info_1 and Customer_info_2 in the Request Section to the Meta > Customer_info_2
Save it
Now let us create on Exception object for Case B
First Add one Transformer under case B
Select the error_code object and assign the value as ERROR_02 and for message object assign the value that “This Case is from Case B”
Likewise assign the value of “Case B Only 1” and “Case B Only 2 “ to custom_info_1 and custom_info_2 variables respectively.
Call the throwException and add it to the service.
Select the throwException and Transformer message with msg and error_code with code respectively.
Now select the throwException service and create customer_info_1 and customer_info_2 under meta variable object.
Map the Customer_info_1 in the Request Section to the Meta > Customer_info_1 and Customer_info_2 in the Request Section to the Meta > Customer_info_2
Now we have created the exception in the SWITCH step under TRY Block and now let us try to catch the exceptions in the CATCH Block.
Right Click on the CATCH block and select Add 🡪 Invoke
Search and select getLastErrorDump and add that to the Workspace in the CATCH Block.
This contains error_code, message, and meta variable objects that are required.
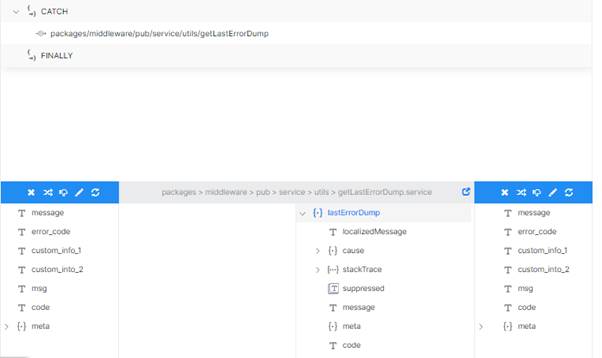
Now create one Document Type lastErrorDump variable in the output section.
Save the Service.
Now open Postman Application and check what is stored in the lastErrorDump variable object.
Set the authentication by copying the API Token and also paste the URL. Set the value equal to A and Click on the send button and visualize the output.
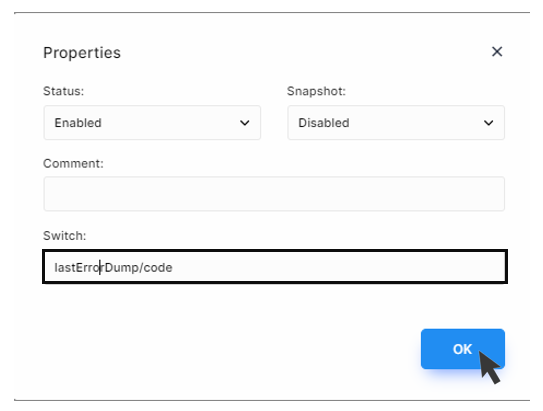
Now go to the Syncloop workspace and delete the lasErrorDump variable in the output section
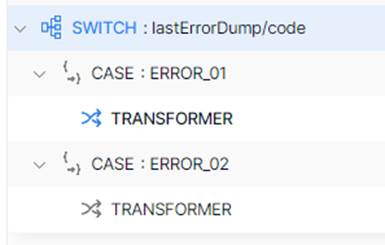
Create new SWITCH that will function on the variable code. Copy the Xpath of the code variable and paste it inside SWITCH 🡪 Switch text Box and click on the OK Button to confirm.
Create a new CASE step and add a Transformer under it.
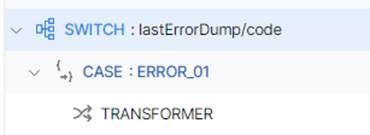
Set the CASE value as ERROR_01 which is already defined in the CASE A of the previous SWITCH statement.
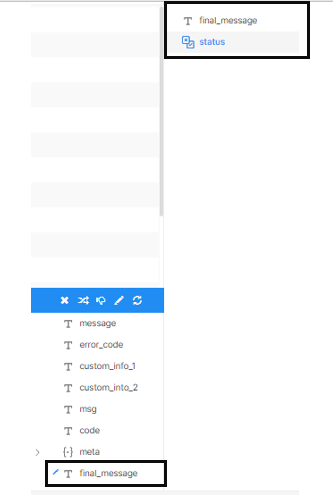
Click on the Transformer under the CASE statement and create a new variable final_message.
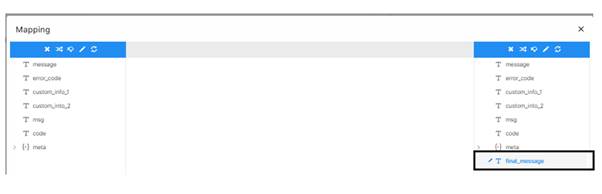
Add one Boolean type variable and name it as status and assign value false to it.
Create one final_message of type string and variable name as status of type Boolean in the Output Parameter section of the workspace.
Create a new CASE and configure it for ERROR_02 value as we did for earlier case and configured it to ERROR_01.
Select the Transformer of CASE ERROR_02 and assign the value to final_message as “This error is coming from Case B”.
Set the status equals to true so that we can differentiate it.
Save it
Now go to the Postman Application and Run it. Click on Send button
We observe that this is the message for CASE A and B with status respectively is given below
When the variable value is assigned as A then at Postman Response we observe

When the variable value is assigned as B then at Postman Response we observe

With this, we have successfully implemented the Exception Handling on the Syncloop Platform.