Docs Menu
- Introduction to Syncloop
- Quick Start Syncloop
-
API Developer Guide
-
middleware
-
pub
- adapter
- authorization
- client
- collection
- date
- docList
- file
- graphQL
- io
- json
- jwt
- math
- platform
- security
- server
- service
- specs
- sql
- string
- bytesToHexString
- bytesToString
- compare
- compareStrings
- concat
- decodeBase64
- decodeHTML
- encodeBase64
- encodeHTML
- equals
- equalsIgnoreCase
- escapeSQL
- fromXML
- htmlDecode
- htmlEncode
- indexOf
- isAlphanumeric
- isBlank
- isDate
- isEmpty
- isNumber
- length
- lookupDict
- maskString
- messageDigest
- messageFormat
- NullOrWhiteSpc
- objectToString
- padLeft
- replace
- rightPad
- stringConcat
- stringIndexOf
- stringToBytes
- subString
- TextArrayToTextString
- TextListCollector
- tokenize
- toLower
- toString
- toUpper
- trim
- urlDecode
- tenant
- util
- xml
-
pub
-
middleware
- User Guide
- FAQs
- Java Docs
- Blogs
Return Custom HTTP Status codes & Headers
Welcome back to our new tutorial. This tutorial will show you how to send custom HTTP status codes and headers and get a response.
Let us get started by logging into the Syncloop workspace

Provide your login credentials and login into the Syncloop Workspace.
Right-Click on the handson 🡪 api folder and select New 🡪 API
A Create New API dialog will be displayed. Enter the service name and assign the developer group and click on OK button to confirm.
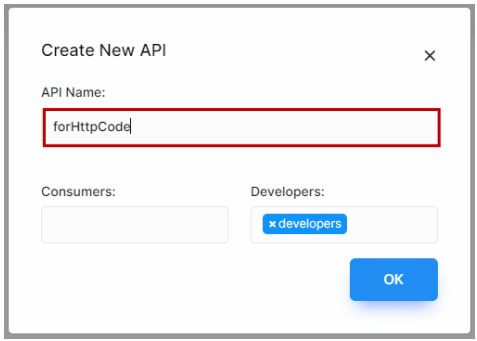
A new API namely forHttpCode will be created in the package explorer.
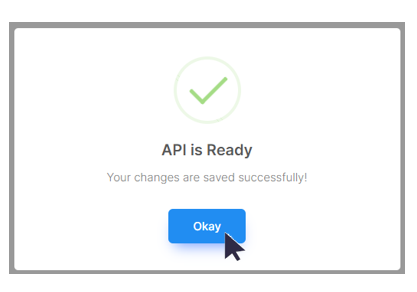
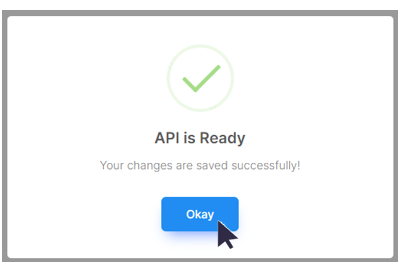
Save the service by clicking on the save button in the Workspace

A save confirmation dialog will be displayed click on the OK button to confirm.
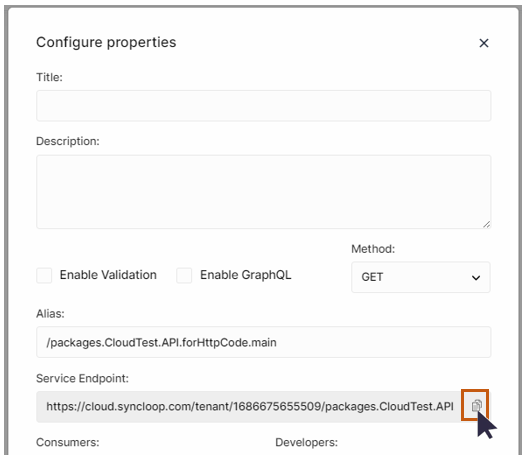
Now click on the configuration tool in the workspace.

A configuration dialog will be displayed. Copy the Service Endpoint by clicking on the copy icon in the configuration properties dialog.
Now open the Postman application and create a new Service Request. Paste the above header in the Enter Request URL.
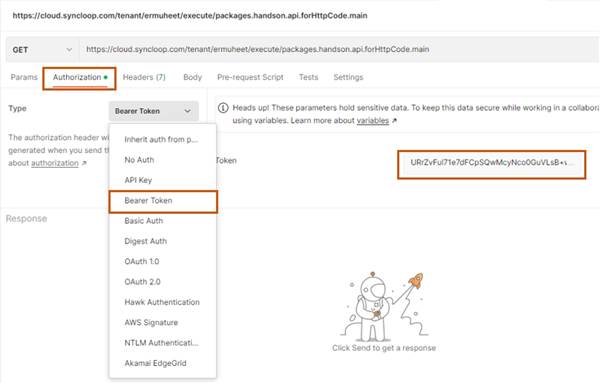
Set the authorization in the Postman application by copying the API token from the Syncloop workspace.
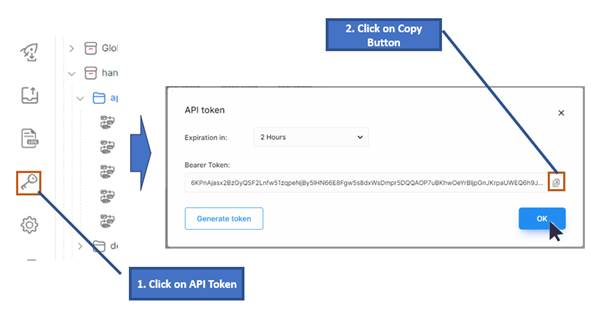
Now paste the copied API token value in the Postman Authentication 🡪 Bearer Token value.
Now click on the Send button and observe the status code in the response.
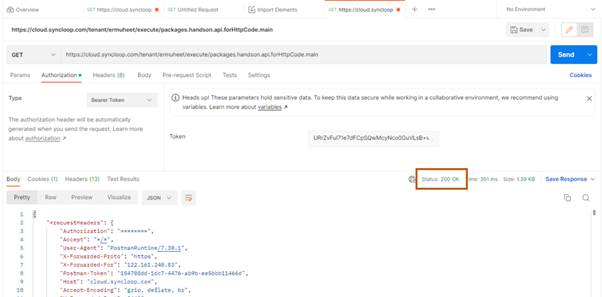
We observe that the HTTP status code is displaying 200 OK. Now let us try to change this status code.
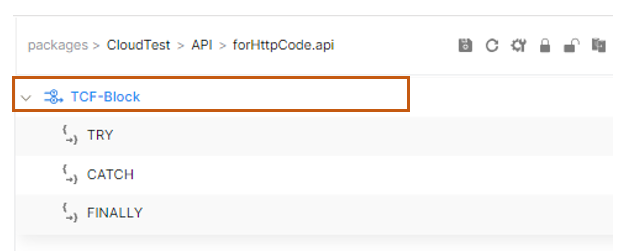
Let us move back to the Syncloop Workspace and create a new TCF-Block. (Try-Catch-Finally). To do that right-click on the Workspace and select TCF-Block

A new TCF-Block will be created
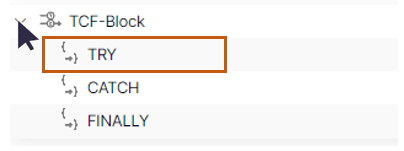
Let us now try to send an error forcefully and observe the output.
Create a TRANSFORMER in the TRY block. Click on the TCF Block so that a tree structure is displayed.
Right-Click on the TRY and select Add 🡪 TRANSFORMER

A TRANSFORMER will be created under TRY Block

Click on the TRANSFORMER and create a new variable of type STRING in the Response Section of the Workspace.

Rename the STRING element to the message by right-clicking on it and selecting Rename

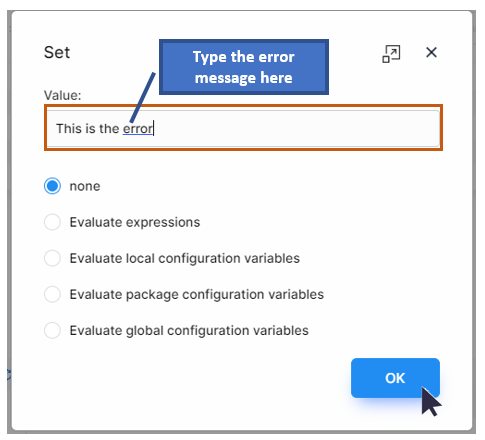
Select the message element and click on the initialize the element ![]() icon. A Set dialog will be displayed. Type
the error message in the value textbox and click on OK button to confirm.
icon. A Set dialog will be displayed. Type
the error message in the value textbox and click on OK button to confirm.
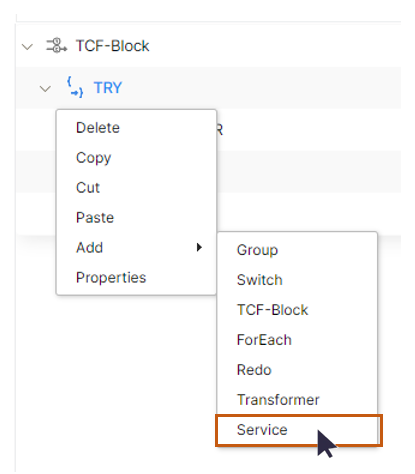
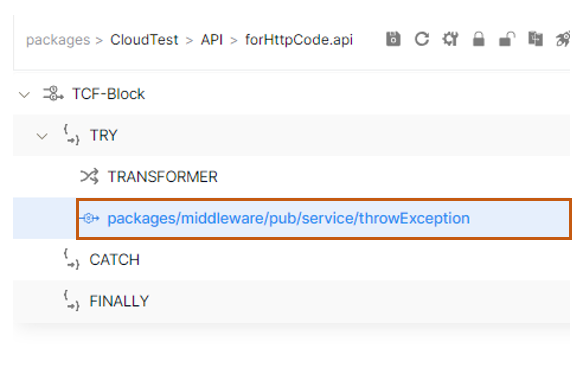
Let us call one service name throwException. Again Right-Click on the TRY block and select Add Service to add a new inbuilt service.
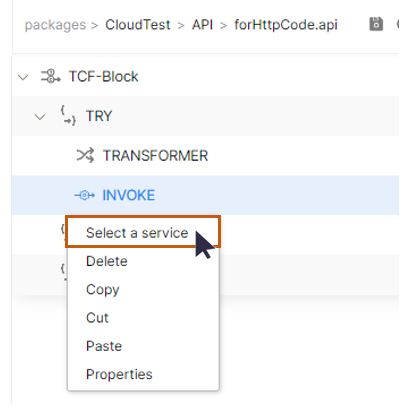
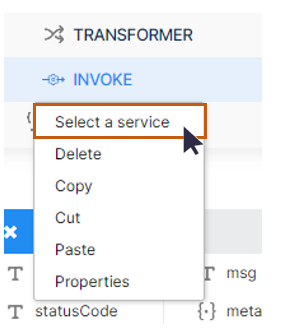
Now Right Click on INVOKE and select “Select a Service”
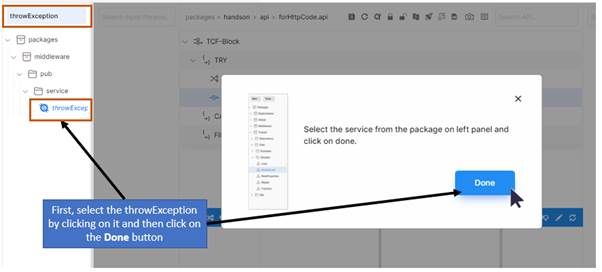
Search the exception name in the search bar as throwException. Select the throw exception in the package explorer and click on the Done button to confirm.
The service will be included under TRY 🡪 TRANSFORMER.
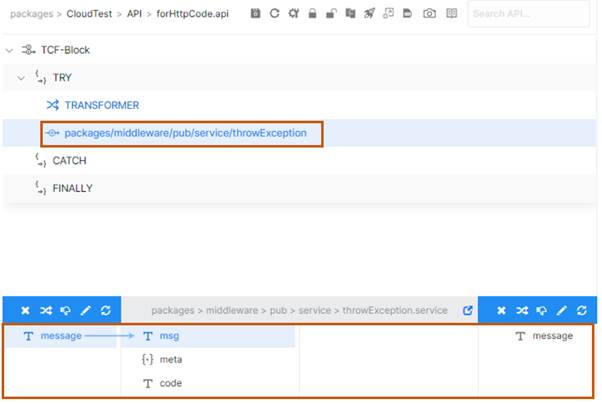
Click on the newly created throwException service and map the message element with msg element by clicking and dragging the cursor from the message element to msg element.
As we created the TRANSFORMER in the TRY block, we will now create a TRANSFORMER in the CATCH block. Right-Click on the catch block and select Add 🡪 TRANSFORMER.
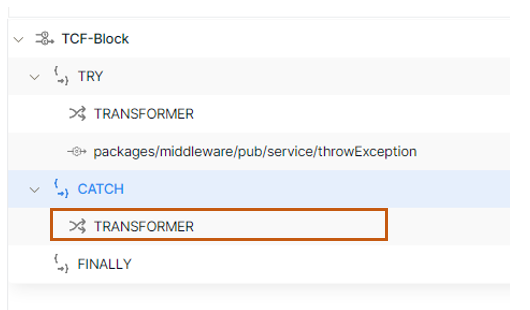
A new TRANSFORMER will be added under the CATCH block.
Click on the throwException Service and select the message element in the Response Section. Click on the Drop an element icon
![]() as this element is not used now.
as this element is not used now.
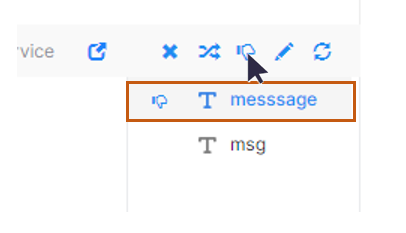
A down-hand thumb icon ![]() will be displayed with the message element. In this case, we want to throw
400 Bad Request error in the response.
will be displayed with the message element. In this case, we want to throw
400 Bad Request error in the response.
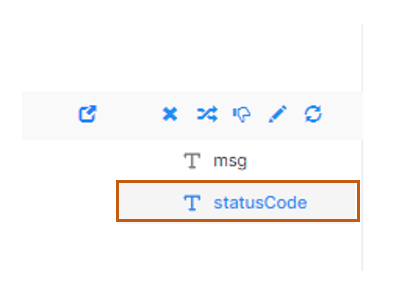
Click on the CATCH 🡪 TRANSFORMER and create a new element variable of type STRING for and Rename it to statusCode.
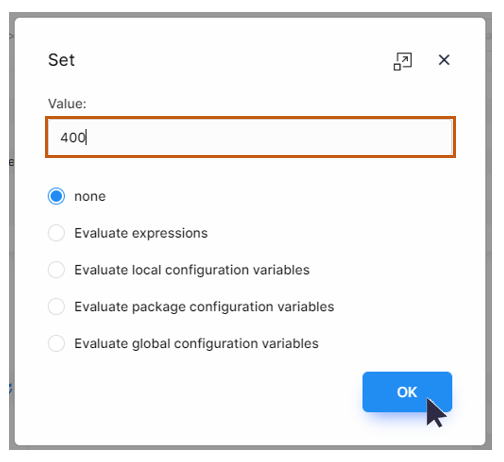
Click on the initialize the element icon ![]() , set the value equal to 400 and click on OK button.
, set the value equal to 400 and click on OK button.
Right Click on the CATCH and add new Service.
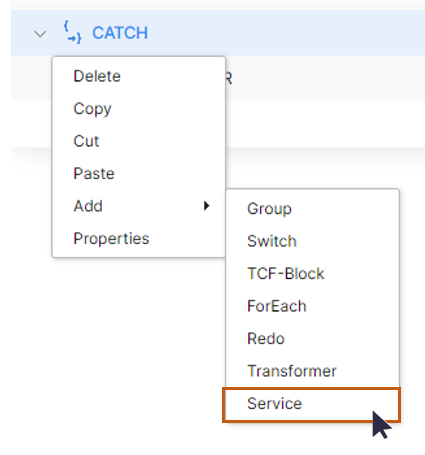
Click on the close button (x) of the Service dialog. An INVOKE will be added.
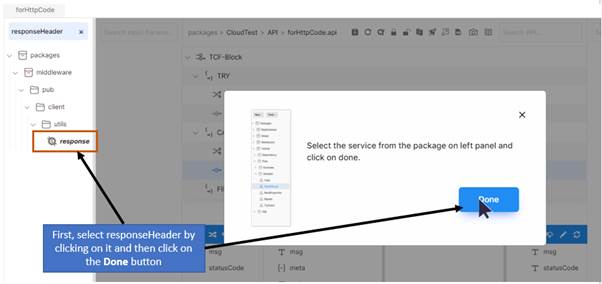
For sending the status code we need to call one service as responseHeader. Search the service name in the package search bar as responseHeader. Select the responseHeader in the package explorer and click on the Done button to confirm.
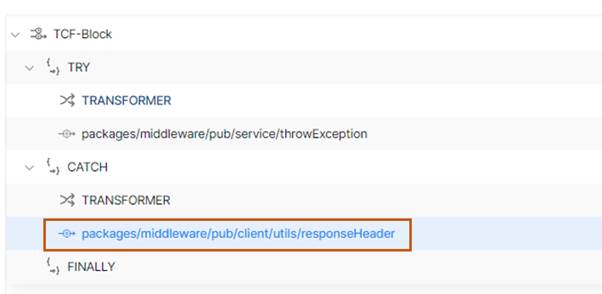
The reponseHeader service will be added to the CATCH block.
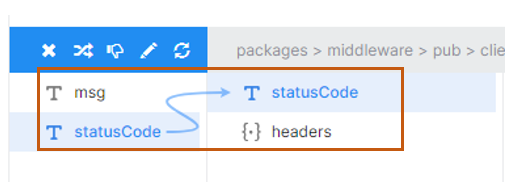
This service enable us to send the service code and the header information. Click on the newly added service and observe the elements in the response.
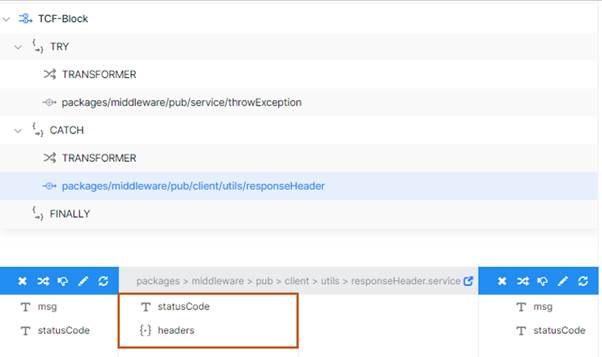
Now map the statusCode
Save the service

A save confirmation dialog will be displayed click on the OK button to confirm.
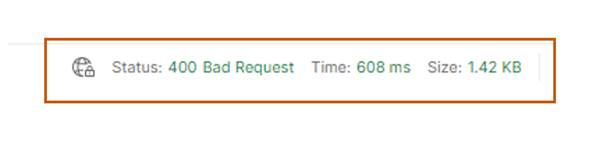
Now go the Postman Application send the request again and observe the response. Here we see that we are getting 400 Bad Request in the response.
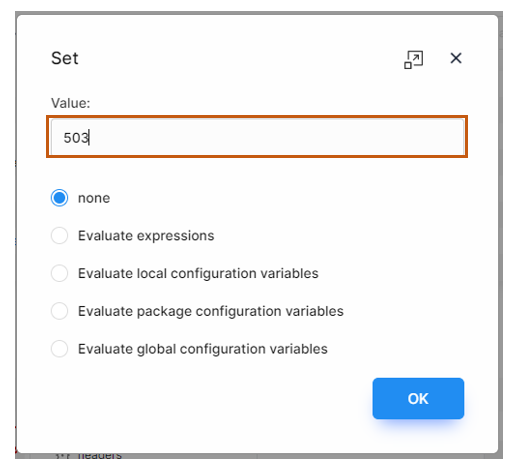
Go back to the workspace. Click on CATCH 🡪 TRANSFORMER and Set and reinitialize the statusCode element value from 400 to 503
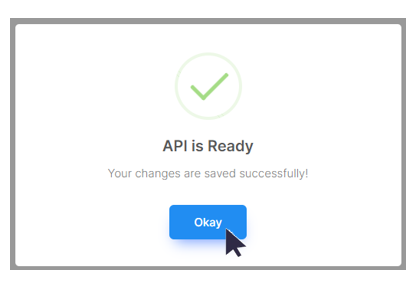
Save the service

A save confirmation dialog will be displayed click on the OK button to confirm.
Now go the Postman Application send the Service Request again and observe the response. Here we observe that we are getting 503 Service Unavailable in the response.
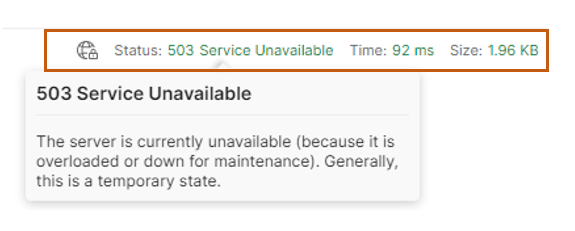
We have clearly observed here that our status code is changing in the Response as we are changing in the workspace.
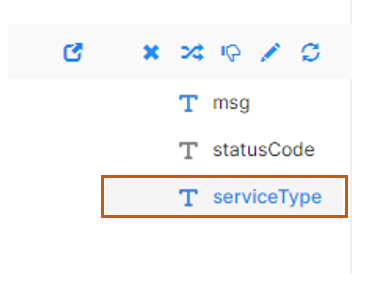
Now let us send some headers also. Click on CATCH 🡪 TRANSFORMER and create new STRING element in the Response Section of the workspace. Rename the STRING to serviceType.
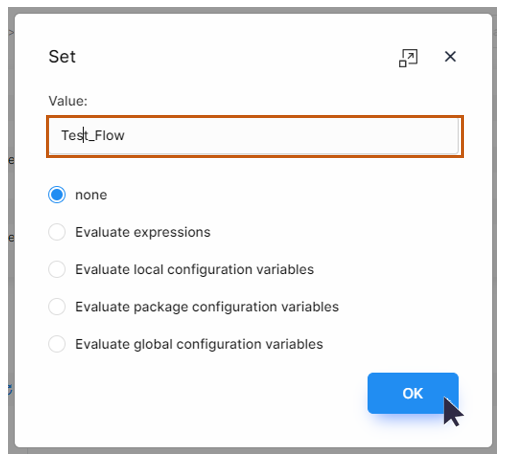
Click on the serviceType element and select pen icon ![]() to set the value to Test_Flow and click
on OK Button
to set the value to Test_Flow and click
on OK Button
Let us create one more value in the Response Section and Rename it as Is_Rest. Select Is_Rest element and select pen icon
 to set the value to true and click OK to confirm.

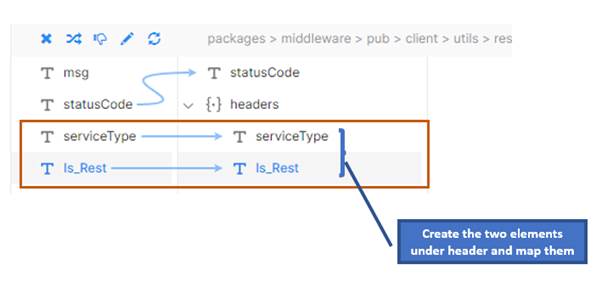
Select the responseHeader Service and pass the two elements serviceType and Is_Rest to the headers element. For that create two elements serviceType and Is_Rest of type STRING under headers element and map them with serviceType is Is_Reset.
Save the service

A save confirmation dialog will be displayed click on the OK button to confirm.
Now go the Postman Application send the request. Click on the Headers and observe that the two elements serviceType and Is_Rest which we had created in the workspace are having same values as we have assigned in the workspace.
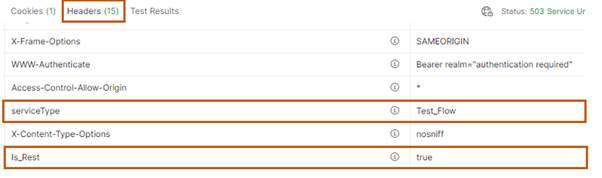
And this is how you can manage the HTTP Status Codes for the response and the variables in the HTTP headers.