Docs Menu
- Introduction to Syncloop
- Quick Start Syncloop
-
API Developer Guide
-
middleware
-
pub
- adapter
- authorization
- client
- collection
- date
- docList
- file
- graphQL
- io
- json
- jwt
- math
- platform
- security
- server
- service
- specs
- sql
- string
- bytesToHexString
- bytesToString
- compare
- compareStrings
- concat
- decodeBase64
- decodeHTML
- encodeBase64
- encodeHTML
- equals
- equalsIgnoreCase
- escapeSQL
- fromXML
- htmlDecode
- htmlEncode
- indexOf
- isAlphanumeric
- isBlank
- isDate
- isEmpty
- isNumber
- length
- lookupDict
- maskString
- messageDigest
- messageFormat
- NullOrWhiteSpc
- objectToString
- padLeft
- replace
- rightPad
- stringConcat
- stringIndexOf
- stringToBytes
- subString
- TextArrayToTextString
- TextListCollector
- tokenize
- toLower
- toString
- toUpper
- trim
- urlDecode
- tenant
- util
- xml
-
pub
-
middleware
- User Guide
- FAQs
- Java Docs
- Blogs
Weather API
This tutorial deals with using an external API in the Syncloop API Development Platform. In this tutorial, we will try to consume an external API on the Syncloop platform and create the response.
In this tutorial we are using a weather API which is given by
The above URL has three parameters appid, lat, lon. The appid is the API key, lat is latitude and lon is longitude. The response data after submitting the above URL is given in JSON format as:
{
    "coord": {
        "lon": 76.6582,
        "lat": 30.7179
    },
    "weather": [
        {
            "id": 800,
            "main": "Clear",
            "description": "clear sky",
            "icon": "01n"
        }
    ],
    "base": "stations",
    "main": {
        "temp": 284.6,
        "feels_like": 283.73,
        "temp_min": 284.6,
        "temp_max": 284.6,
        "pressure": 1018,
        "humidity": 74,
        "sea_level": 1018,
        "grnd_level": 981
    },
    "visibility": 10000,
    "wind": {
        "speed": 3.22,
        "deg": 320,
        "gust": 5.73
    },
    "clouds": {
        "all": 0
    },
    "dt": 1674835755,
    "sys": {
        "country": "IN",
        "sunrise": 1674784069,
        "sunset": 1674822234
    },
    "timezone": 19800,
    "id": 1266960,
    "name": "Kharar",
    "cod": 200
}
To start with click Login in the Syncloop workspace by clicking on the link below

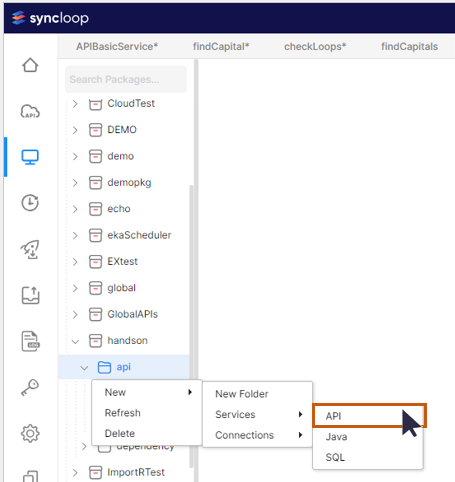
Click on the Package and select the handson package which we have already created and select api folder. Right-click on the api folder and select New 🡪 services 🡪 API.
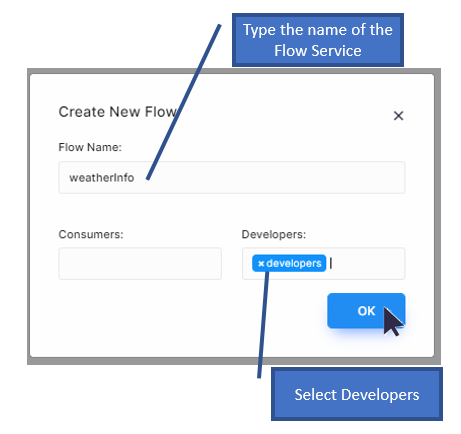
A Create New API Dialog will appear.
Type the API Service name as weatherInfo, select the developer groups for consumers and developers from the drop-down list, and click on the OK Button.
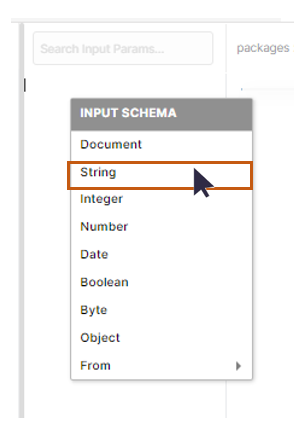
As this is a Weather API, we expect two inputs one for the Latitude coordinate and one for the Longitude coordinate. Both values are of type string.
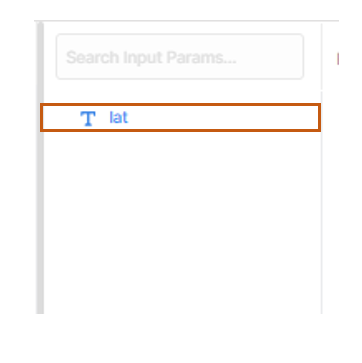
Create input parameters for latitude and longitude. Right-click on the Input Parameter Section and select String and rename it as lat
A parameter of type String will be created.
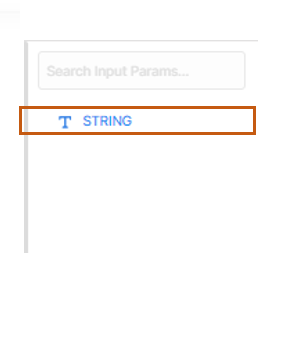
Now Right-Click on the Parameter String and select rename
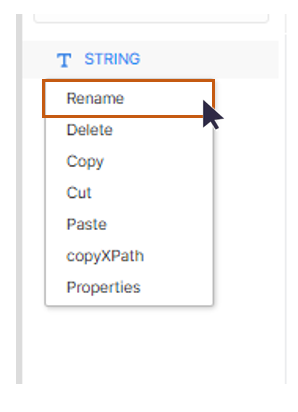
Rename the String Parameter to lat (for latitude coordinate)
Repeat the process for creating another parameter lon (for longitude)
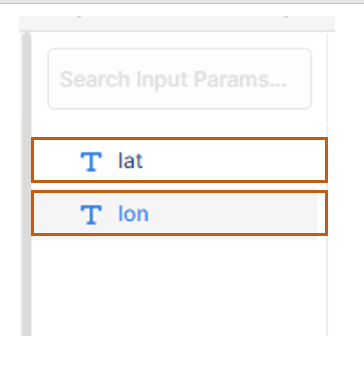
Now we have created two input parameters lat and lon for storing latitude and longitude coordinates
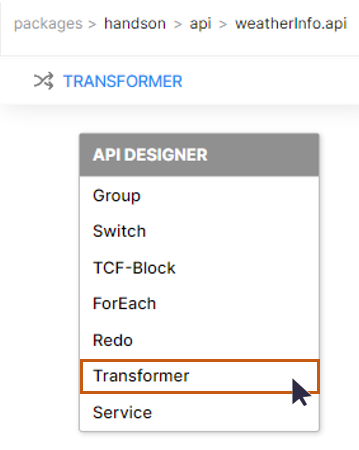
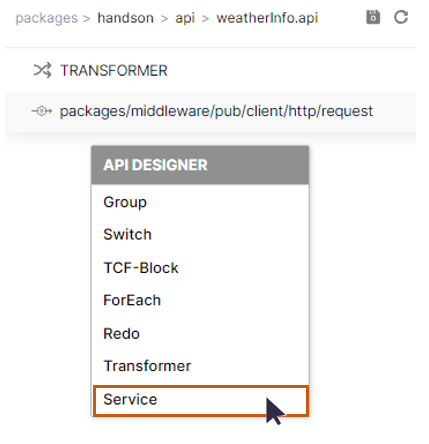
Right-click on the workspace and a API DESIGNER context menu will appear. In the context menu select Transformer.
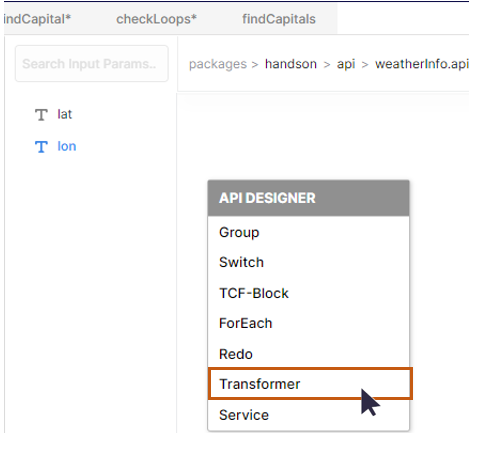
This will create one Transformer in the workspace.
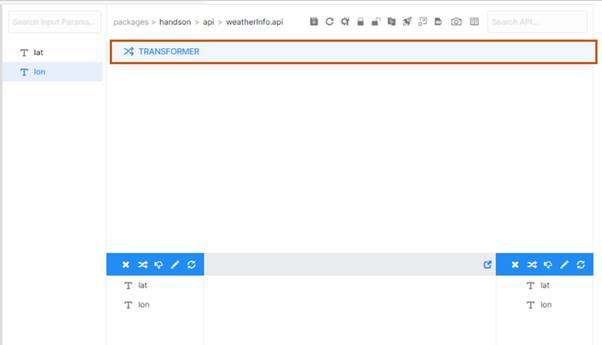
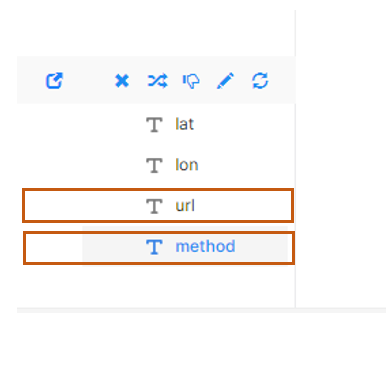
Now let us initialize a few parameters url and method
Right-Click on the Response Section and in the context menu select String. Right-Click on the String and rename it to url. Repeat the above steps to create one more element in the Response Section and rename it to method.
URL-A (Static) http://api.openweathermap.org/data/2.5/weather?appid=8491317325e3d20e220876c31fce2812&lat=30.7179016&lon=76.65822
Here lat and lon values may be replaced by input parameters and the corresponding url will be rewritten as. This will make these values dynamic.
URL-B (Dynamic)
http://api.openweathermap.org/data/2.5/weather?appid=8491317325e3d20e220876 c31fce2812&lat=#{lat}&lon=#{lon}
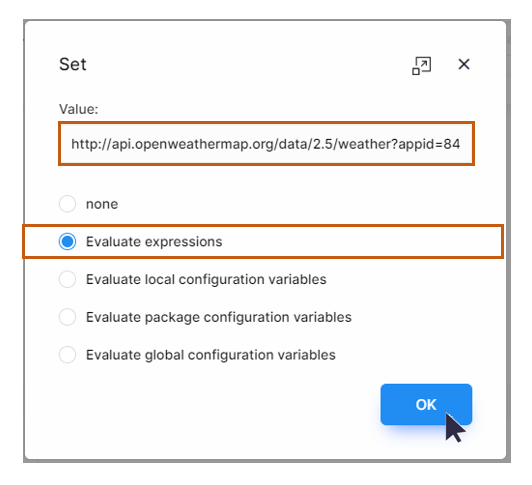
Click on the url element and select initialize an element from the toolbar. A Set dialog window will be displayed. Enter the above url in the below format.
Copy and paste the above URL-B in the value textbox and select evaluate expression from the options and click on the OK button.
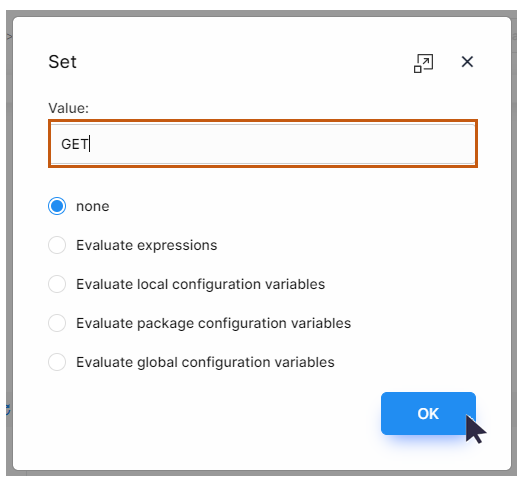
Now select the method element in the Response Section and click on initialize an element.
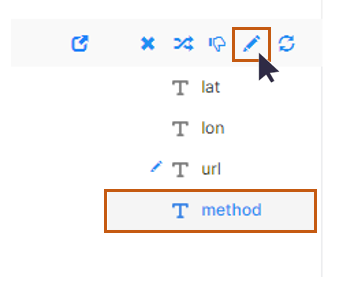
A Set window dialog will be displayed. Type GET in the value textbox and click on OK button.
Now let us add one HTTP Client. Click on the Syncloop workspace, a API DESIGNER context menu will appear. Select Service option from the context menu by clicking on it.
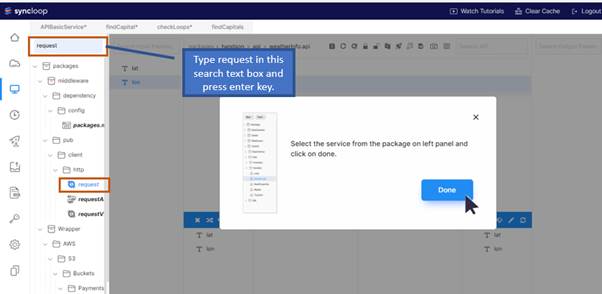
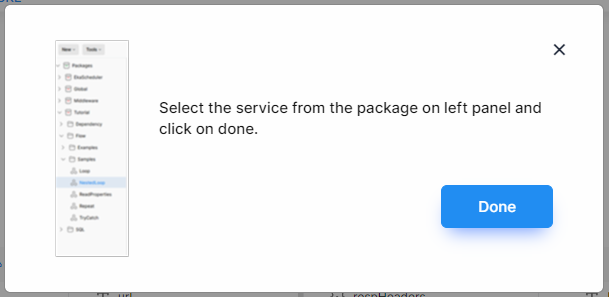
Click on Select a service from the menu. Select a service dialog will be displayed.
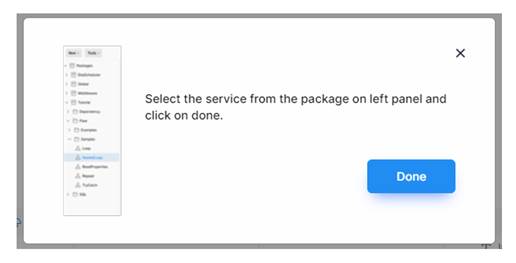
Now type request into the package explorer search text box so as to search it. Click on the request and then click on the Done Button
Now click on the request service and all the parameters will be displayed in the Request and Response Section of the workspace.
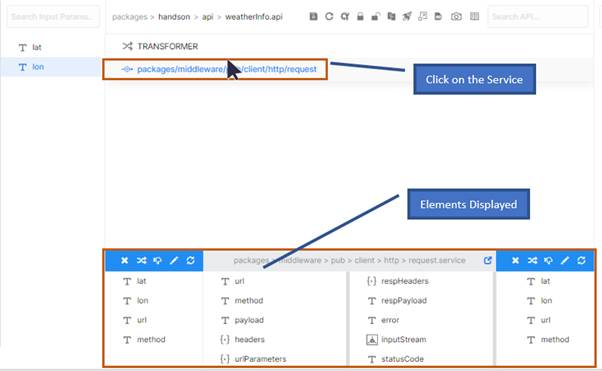
Now pass the parameters for url and method elements.
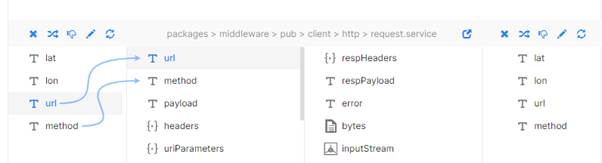
Two connections between url->url and method->method will be created by clicking and dragging on the two element pairs.
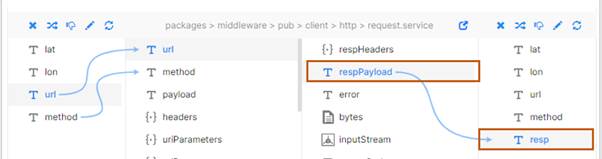
Now Create one parameter resp of type String in the response section and map resPayload with it.
Save the project by clicking on the save tool bar in the workspace. A save dialog box will appear confirming the save operation. Click on Okay button to close the dialog.

A message dialog box will appear confirming the save operation.
Now we have the response in the form of the string and we need to convert this string into JSON format. For that we need to add one more HTTP Client. The service is to be created so that the string output may be converted to JSON format.
Click on the Syncloop workspace, and an API DESIGNER context menu will appear. Select the Service option from the context menu by clicking on it.
A select a service dialog will be displayed.
Now Type fromJSON keyword in the package explorer search text box and click enter
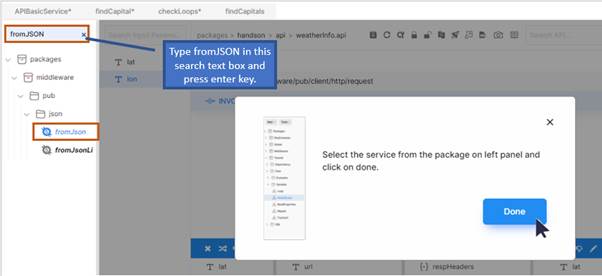
Click on from.JSON in the package explorer and click on Done button to close the dialog. The from.JSON service will be added to the workspace. Now click on the service and observe the elements being displayed in the workspace.
This is done to convert the String element resp to JSON format we need to call the service fromJSON.
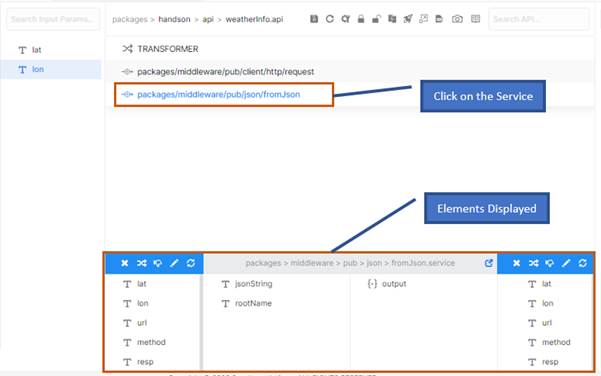
Map the input parameter resp with jsonString and create a new output parameter response of type Document and map it with output.
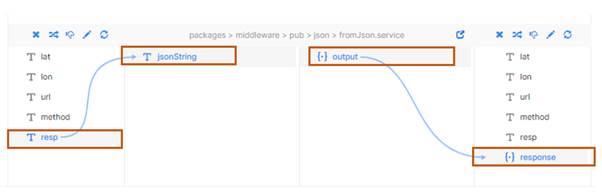
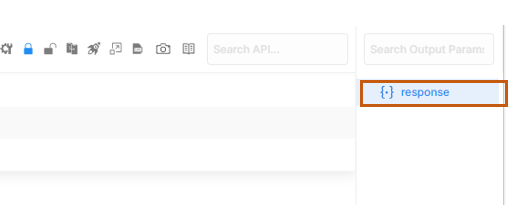
Create the same parameter response of type Document in the output section
Save the service by clicking on the save tool bar in the workspace. A save dialog box will appear confirming the save operation. Click on Okay button to close the dialog.

A message dialog box will appear confirming the save operation.
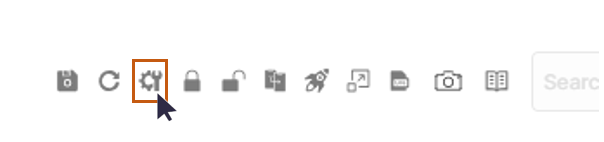
Our web service is complete and let us test it now. Click on the configuration tool in the workspace tool bar.
A configuration properties dialog will appear. Copy the endpoint value from the toolbar by clicking on the copy icon and then clicking on the OK button to close the dialog.
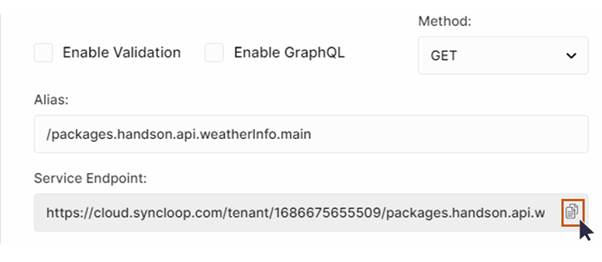
A copied message will be displayed on the copy tool confirming copy operation.
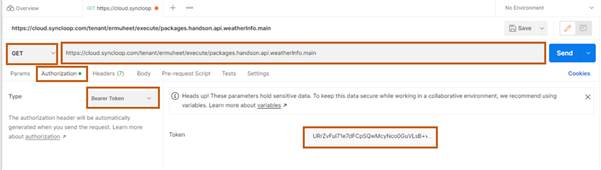
Open the Postman application and create a new request. Paste the service endpoint value in the request URL. Set authorization🡪 Bearer Token value to the copied value of API token from the Syncloop workspace. Set method to GET
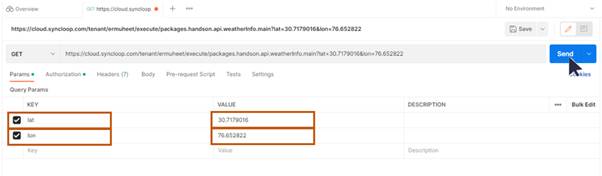
Add two key parameters lat and lon and set their values and click on Send button to send the request.
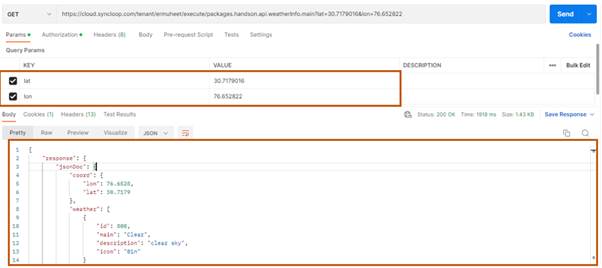
Here we clearly observe that we get the similar response from that external weather API
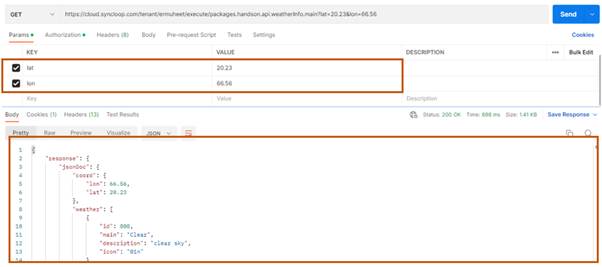
Now we can change the parameter values of lat and lon for various regions and observe the climatic conditions.
This is how you can create an integrate external API using a Syncloop API development platform.