Docs Menu
- Introduction to Syncloop
- Quick Start Syncloop
-
API Developer Guide
-
middleware
-
pub
- adapter
- authorization
- client
- collection
- date
- docList
- file
- graphQL
- io
- json
- jwt
- math
- platform
- security
- server
- service
- specs
- sql
- string
- bytesToHexString
- bytesToString
- compare
- compareStrings
- concat
- decodeBase64
- decodeHTML
- encodeBase64
- encodeHTML
- equals
- equalsIgnoreCase
- escapeSQL
- fromXML
- htmlDecode
- htmlEncode
- indexOf
- isAlphanumeric
- isBlank
- isDate
- isEmpty
- isNumber
- length
- lookupDict
- maskString
- messageDigest
- messageFormat
- NullOrWhiteSpc
- objectToString
- padLeft
- replace
- rightPad
- stringConcat
- stringIndexOf
- stringToBytes
- subString
- TextArrayToTextString
- TextListCollector
- tokenize
- toLower
- toString
- toUpper
- trim
- urlDecode
- tenant
- util
- xml
-
pub
-
middleware
- User Guide
- FAQs
- Java Docs
- Blogs
Building API using Looping Logic
This is the 3rd Web Service that is connected to the conditional logic Web Service. In this service, we will send multiple countries and try to get their capital using the API created previously for conditional logic.
In this web service, we are sending the country name as a request and getting the capital of that country in response using the Syncloop Platform.
Login into the Syncloop Development Platform and let us start creating that Service.
Right Click on Package root in the package explorer window and select New Package
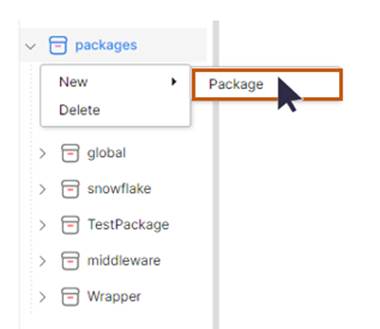
A Package dialog box will appear.
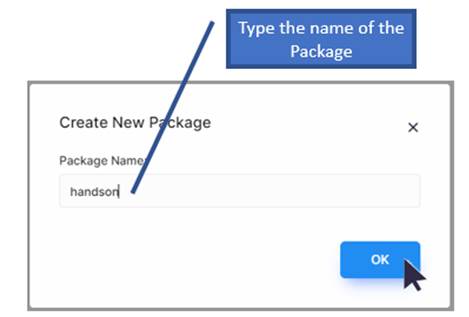
In the Package Name Text-Box, type the name of the package as hands-on and click on Ok Button.
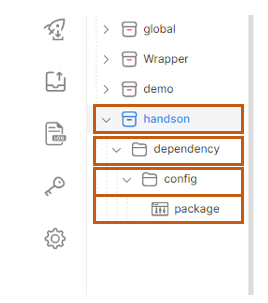
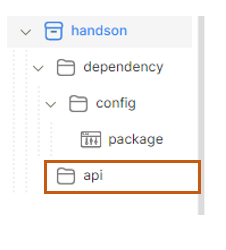
Package handson will be created in the package explorer with one dependency folder, a child folder config, and a default child package. Now Right-Click on the handson package and create a new folder api. Type the name of the folder and click the button Ok.
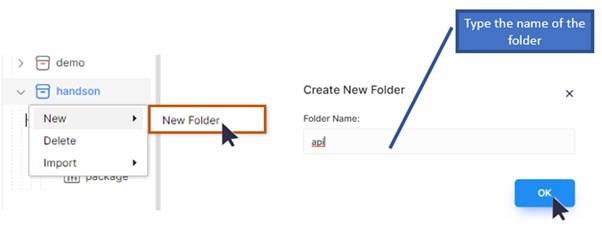
A new folder named api will be created under the handson folder.
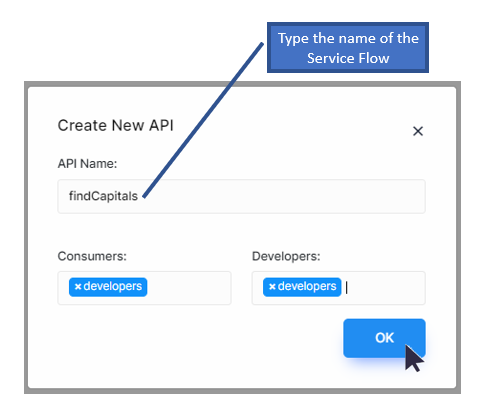
Right-Click on the api folder select New 🡪 Services and click on API.

A Create New API dialog box will appear. Click on the API Name text box, type findCapitals, select the developer groups for consumers and developers from drop-down lists, and click on the OK button to confirm.
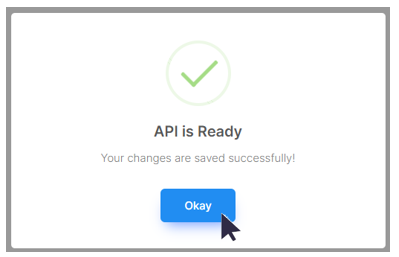
The naming details of the Syncloop workspace environment have already been shown in the Quick Start Document. Click save to save the web service.

A message dialog box will appear confirming the save operation.
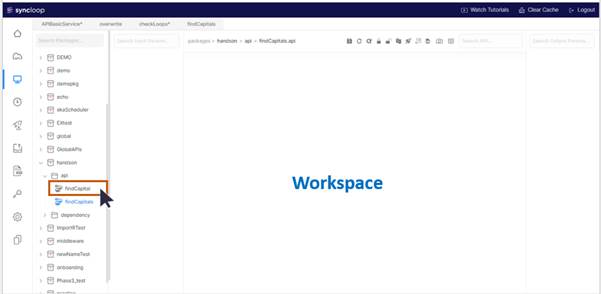
Double-click on the findCapitals in the Package Explorer and open the Workspace Window.
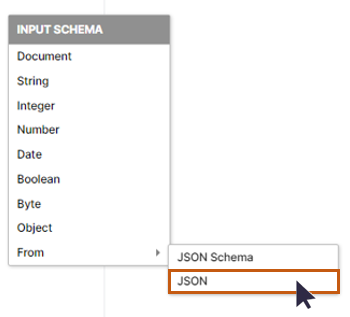
Right-Click on the input parameter section and an INPUT SCHEMA content menu will appear. select From-> JSON from the context menu.
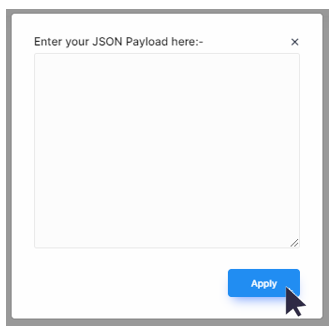
A JSON Input Dialog will appear prompting for “Enter JSON Payload here”. As we have to enter multiple countries as input, we will be using arrays for such inputs. This input is also termed Input Payload for the Web Service.
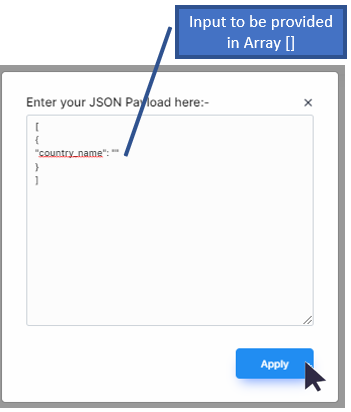
Type the input payload for the Web Service in an Array. Here specify “country_name”:”” in an array and click on Apply button.
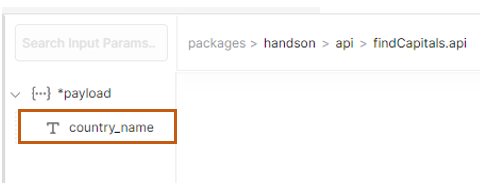
This will create an Input Payload for the Web Service and is viewed in the Input Parameter section of the Workspace Window.
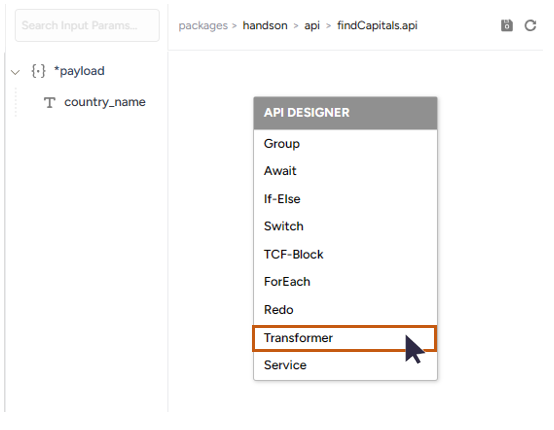
Right-Click on the Control Flow Section of the workspace. A API DESIGNER context menu will appear. Select Transformer from the context menu and left-click on it.
The Transformer will be displayed in the Control Flow Section and payloads will be displayed in the Request Section and Response Section of the Workspace window.
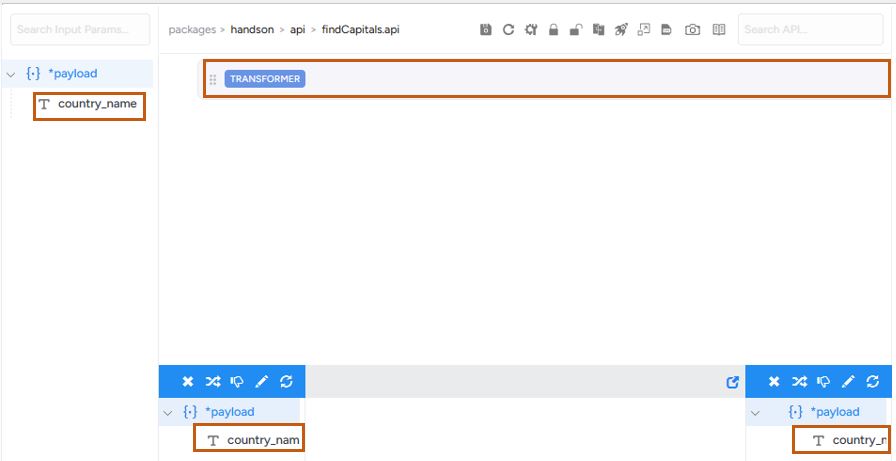
We
clearly visualize the country_name parameter in the Request and
Response section of the Workspace Window. As we need to transfer the
value of country_name to some other container. Drop the Response Section
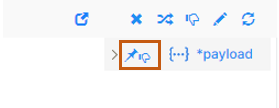
Payroll by selecting the payload and clicking on the thumbs-down ![]() tool in the Response
Section. It will not be used in further steps.
tool in the Response
Section. It will not be used in further steps.

The thumbs-down image will be displayed with the payload.
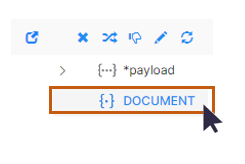
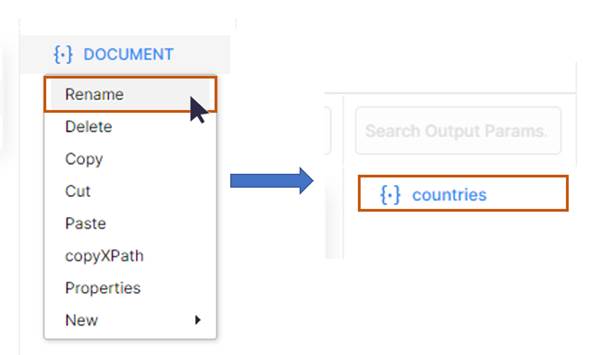
Right-Click on the Response Section and the OUTPUT SCHEMA context menu will appear select the Document option.
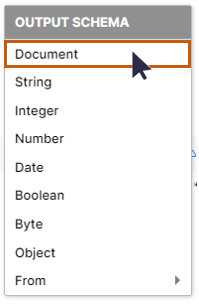
A DOCUMENT Parameter will be created in the Response Section
Right-Click on the DOCUMENT parameter and select rename option.
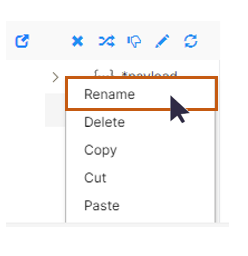
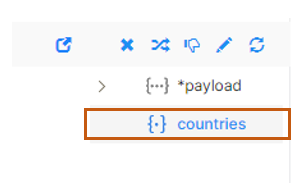
Rename it as countries.
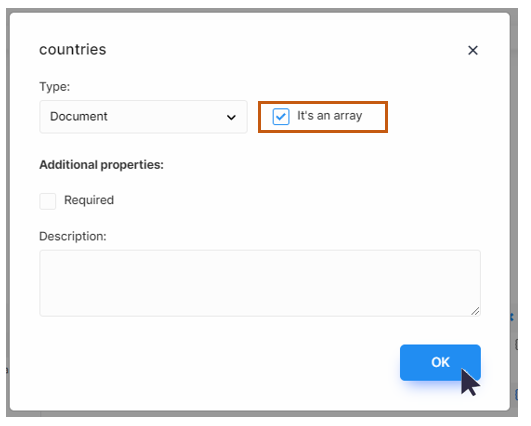
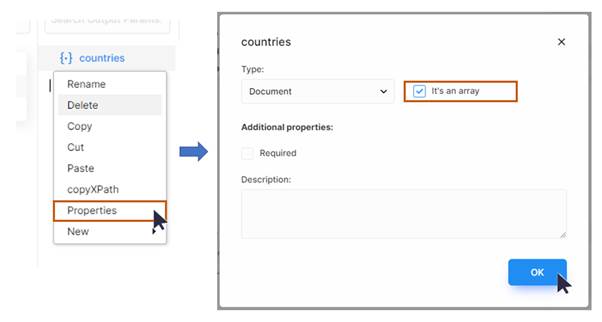
Right-Click on the countries parameter and select Properties from the context menu.

The Properties window of the countries parameter will be displayed.
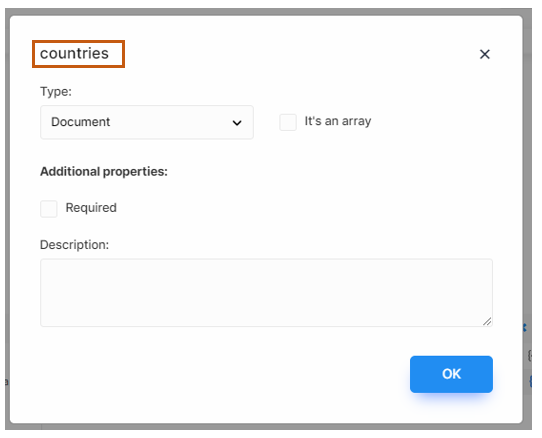
Select the “It’s an array” check box and click the OK button.
Right Click on countries, and a context menu will appear. Select New 🡪 Stringfrom the menu

Save the Web Service by clicking on the Save tool at the top of the Workspace toolbar.

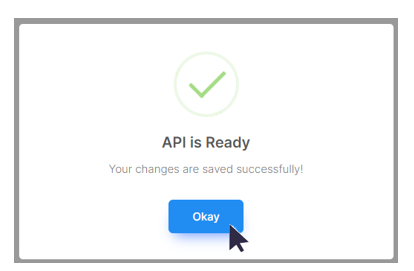
A message dialog box will appear confirming the save operation.
Rename the STRING as country_name
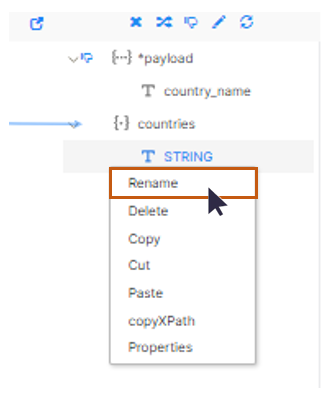
Rename the STRING parameter as country_name
Click on the payload 🡪 country_name in the Request Section and drag the cursor to the countries 🡪 country_name in the Response Section of the Workspace window.
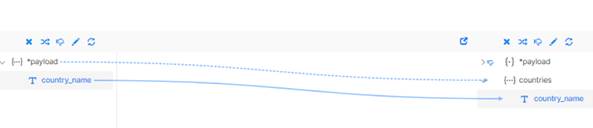
A link will be created and will also be visible by a line joining/mapping the two Request and Response parameters. While mapping the child elements *payload 🡪 country_name will be mapped with countries 🡪 country_name, the parent elements *payload and countries will also be mapped.
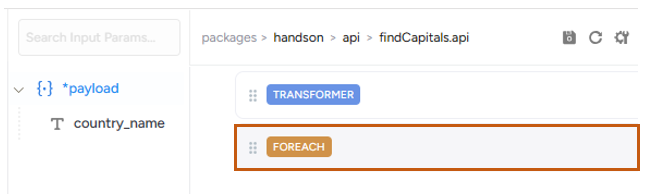
Now we need to run the loop onto the countries document (array). So Right-click on the workspace and select loop.
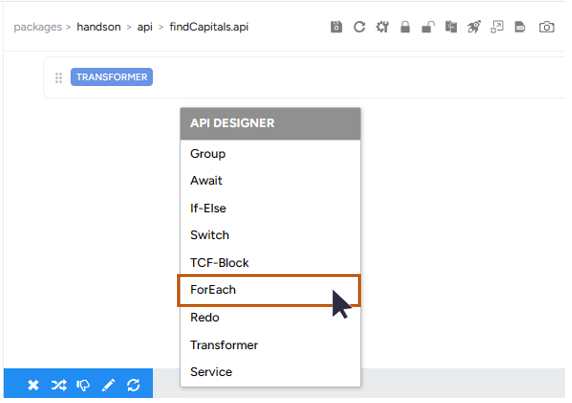
A ForEach loop will be created in the workspace.
Now Right-Click on the ForEach loop and select properties.
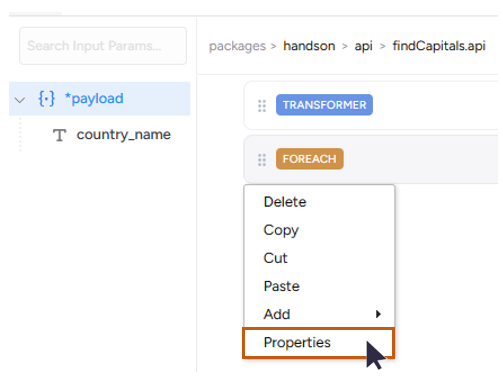
The properties dialog will be displayed
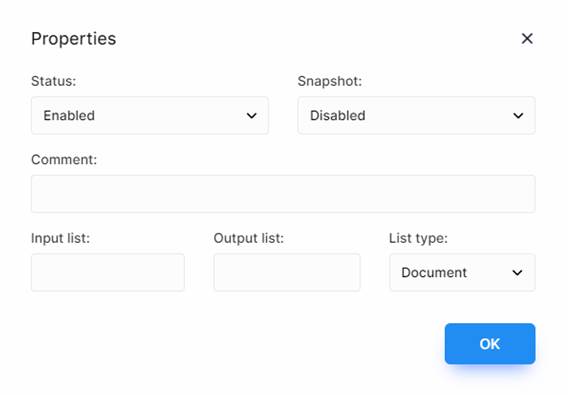
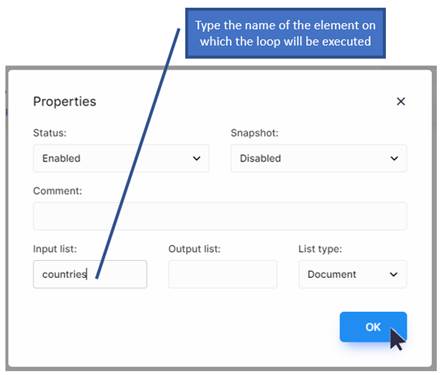
In the input list textbox enter the element on which the loop will be implemented. It can be done using two ways.
1. Go to the Response Section of Syncloop IDE, copy the element’s XPath, and paste it into the input list textbox.
2. Type directly the name of the element in the input list TextBox (Here it is countries)
Type countries in the input list text box and click on the OK button
Right Click on the ForEach and add Service
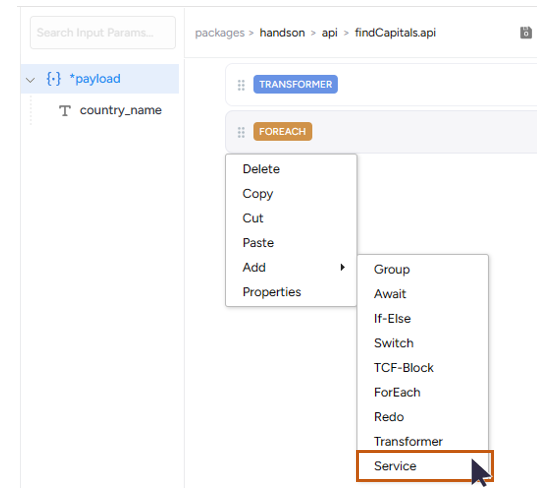
A dialog will be displayed. Select the previous web service findCapital and click on the Done button to confirm.
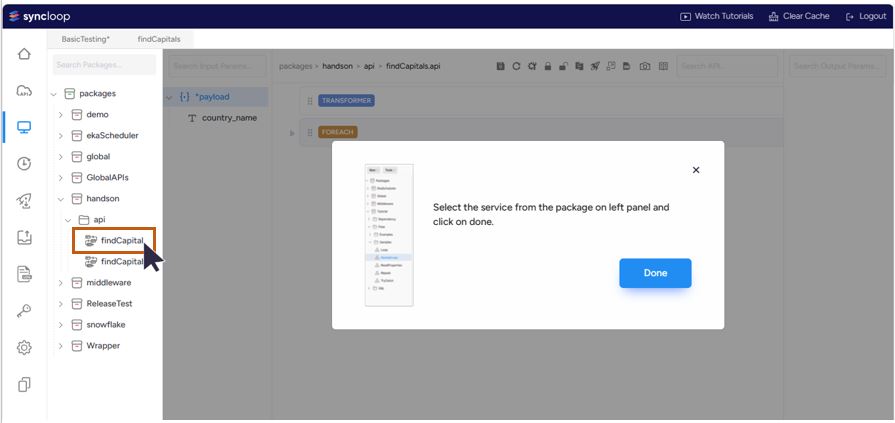
The path of the web service in the package will be appended as the child of the INVOKE
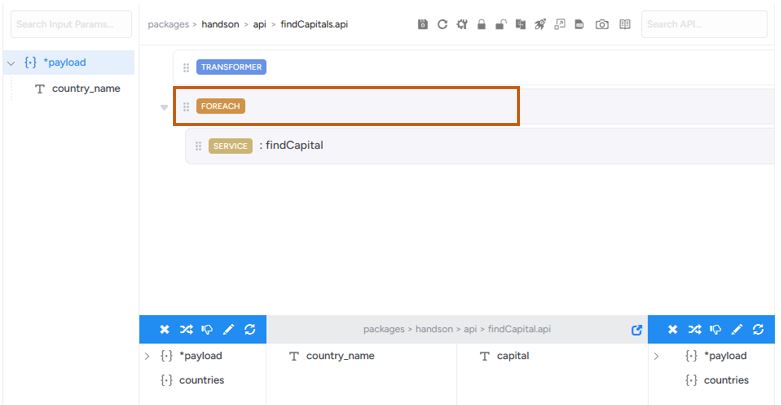
Now we need to send the county in the loop and get the capital. Click on the packages/handson/api/findcapital link and observe the elements in the Request and Response Section of the Syncloop Workspace.
Let us map country_name with country_name in the request section of the workspace.
A link has been established between two country_name elements in the Request Section of Workspace.
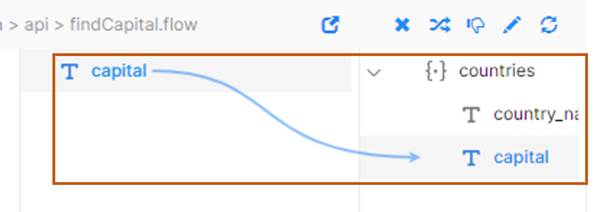
Right-click on countries and create one more STRING parameter.

Rename the parameter as capitals
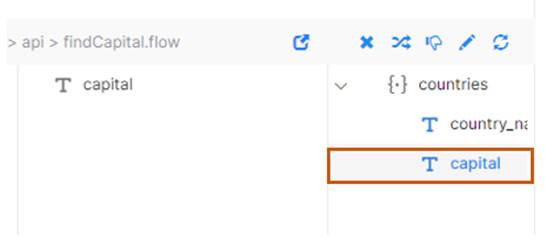
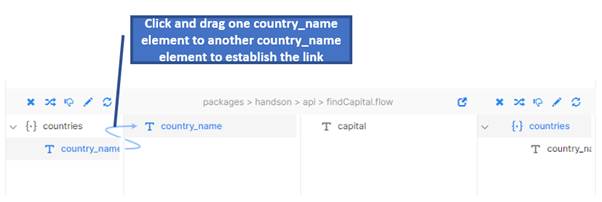
Now map the capital with countries 🡪 capital from click and dragging capital to countries 🡪 capital to create a link shown below.
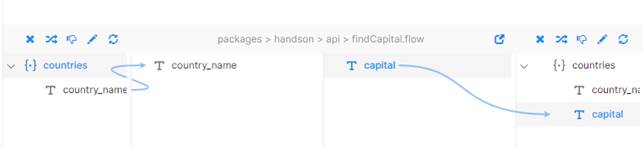
Now both mappings are displayed
Create an output parameter as document type by right-clicking on the Output Parameter Section.
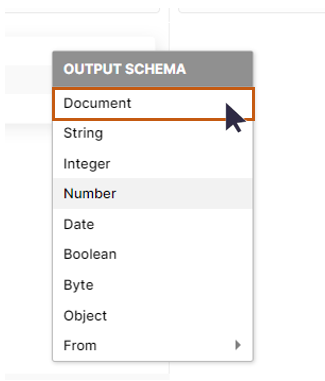
A document type parameter will be created.

Right-Click on the DOCUMENT and select rename and rename it to countries.
DOCUMENT has been renamed to countries.
Right-click on countries and select properties .
Check it’s an array option and click on the OK button. Now click on the save tool on the workspace toolbar.

A save confirmation dialog will be displayed. Click on Okay button to confirm it.
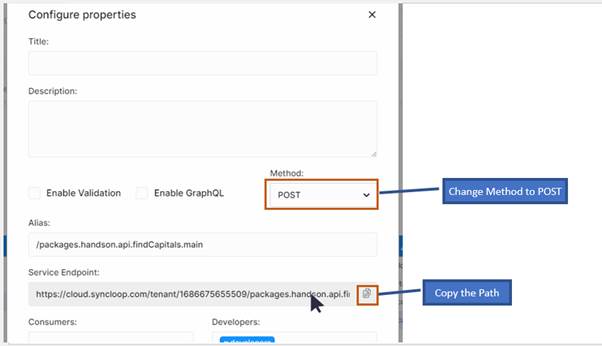
Click on the configuration button ![]() from
the tool bar. Configuration dialog will be displayed.
from
the tool bar. Configuration dialog will be displayed.
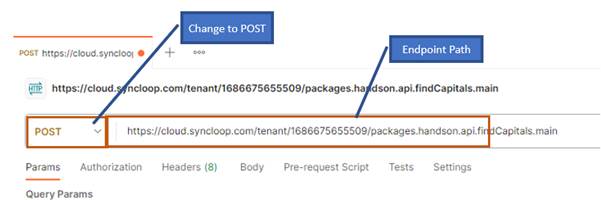
On the configure properties dialog change method to POST as we are sending the request payload. Copy the copy button on the service endpoint and copy the path.
Click on the OK Button.
A save confirmation dialog will be displayed. Click on Okay button to confirm it.
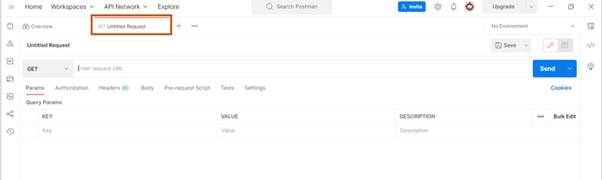
Now open the Postman application and Click on the + to create a new HTTP request as Untitled Request
Copy the endpoint path in the Enter Request URL text box and change GET to POST in the drop-down menu.
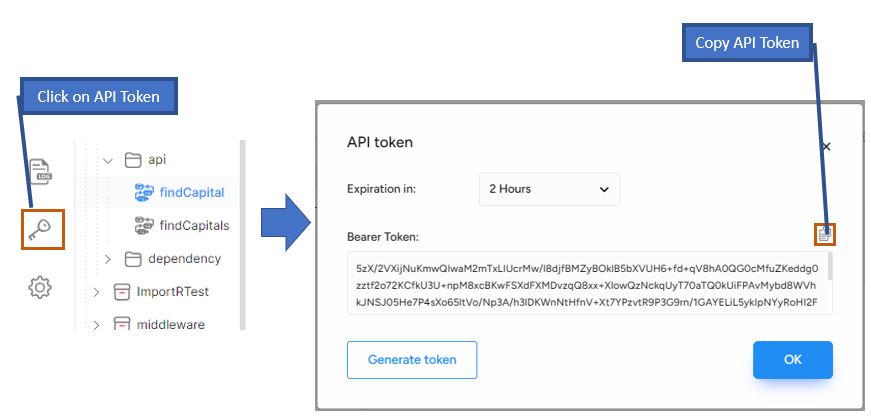
Now change the authorization by copying the API Token from the Syncloop workspace
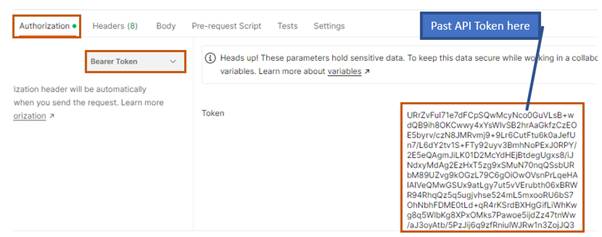
Paste the same into the Authorization 🡪 Bearer Token 🡪 Bearer Token text box.
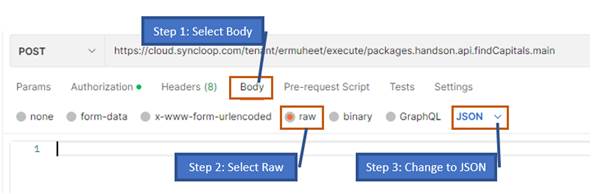
No in the Postman application go into the Body 🡪 Raw section and create your payload in the text box as shown below. Also, change the Text drop-down property to JSON.
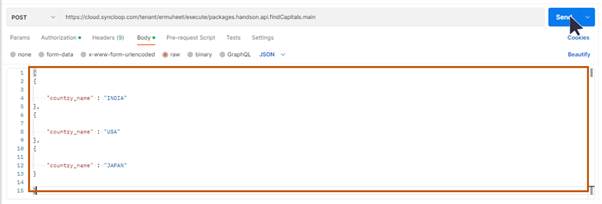
Now enter the payload for multiple countries in JSON format.
[
{
    "country_name" : "INDIA"
},
{
    "country_name" : "USA"
},
{
    "country_name" : "JAPAN"
}
]
Place the JSON code in the text box and click on Send Button
Observe the response
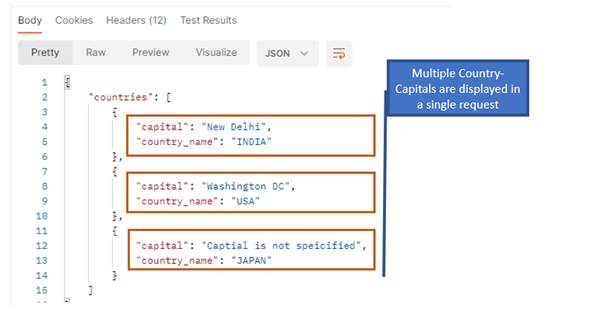
Multiple Countries and Capitals are displayed in a single request when the payload is sent in JSON format.
